ASANA OF THE DAY: MATSYASANA

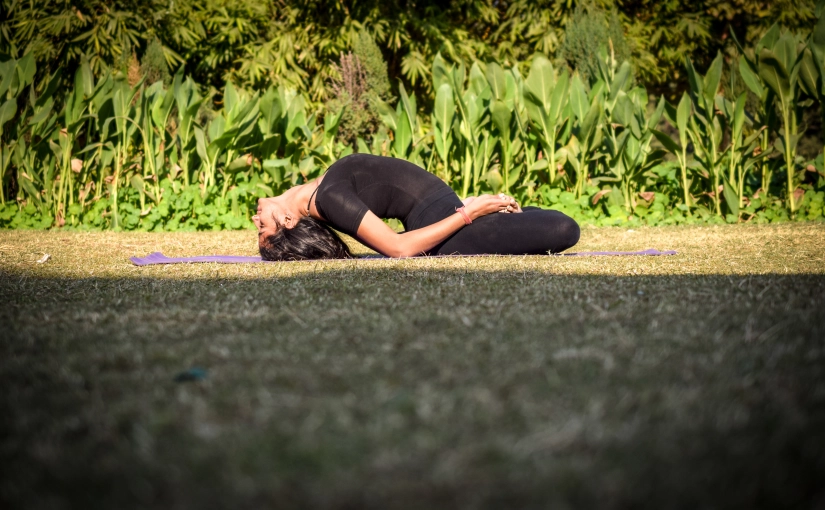
Fish Pose: Step-by-Step Instructions (Matsya= Fish)

Therapeutic Applications:

  1. Constipation
  2. Respiratory ailments
  3. Mild backache
  4. Fatigue
  5. Anxiety
  6. Menstrual pain

BENEFITS:

  • A traditional text that Matsyasana is the “destroyer of all diseases.”
  • Stretches the deep hip flexures (psoas) and the muscles (intercostal) between the ribs
  • Stretches and stimulates the muscles of the belly and front of the neck
  • Stretches and stimulates the organs of the belly and throat
  • Strengthens the muscles of the upper back and back of the neck
  • Improves posture


PROCEDURE :

Step 1

Start with basic PADMASANA (for instructions click the link) ASANA OF THE DAY: PADMASANA

After sitting in PADMASANA, gently lie down on the floor , with your back touching the ground.

Step 2

After lying down, try to reach out with your hands and hold the toes of your feet as shown in the image above.

Step 3

Inhale and press your forearms and elbows firmly against the floor. Next press your scapulae into your back and, with an inhale, lift your upper torso and head away from the floor. Then release your head back onto the floor. Depending on how high you arch your back and lift your chest, either the back of your head or its crown will rest on the floor. There should be a minimal amount of weight on your head to avoid crunching your neck.

Step 4

Stay for 15 to 30 seconds, breathing smoothly. With an exhalation lower your torso and head to the floor. Draw your thighs up into your belly and squeeze.


PICTURE COURTESY: HARSHIT SADEJA

THANK YOU FOR READING ! FEEL FREE TO CONTACT FOR ANY QUERIES AND ADVICES !

DO NOT FORGET TO LIKE, COMMENT AND SHARE !

FOLLOW TO REMAIN INFORMED ABOUT NEW UPDATES 🙂

STAY FIT, STAY HEALTHY ❤

ASANA OF THE DAY : PASHCHIMOTTAN-ASANA

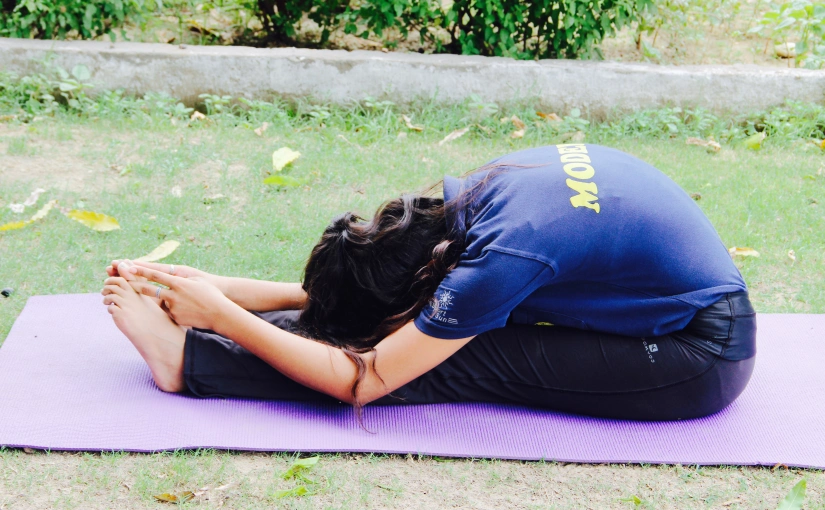
PASHCHIMOTTANASANA (Seated Forward Bend):

Step-by-Step Instructions

  • Step 1

Sit on the floor with your buttocks supported on a folded blanket and your legs straight in front of you. Press actively through your heels. Rock slightly onto your left buttock, and pull your right sitting bone away from the heel with your right hand. Repeat on the other side. Turn the top thighs in slightly and press them down into the floor. Press through your palms or finger tips on the floor beside your hips and lift the top of the sternum toward the ceiling as the top thighs descend.

  • Step 2

Draw the inner groins deep into the pelvis. Inhale, and keeping the front torso long, lean forward from the hip joints, not the waist. Lengthen the tailbone away from the back of your pelvis. If possible take the sides of the feet with your hands, thumbs on the soles, elbows fully extended; if this isn’t possible, loop a strap around the foot soles, and hold the strap firmly. Be sure your elbows are straight, not bent.

  • Step 3

When you are ready to go further, don’t forcefully pull yourself into the forward bend, whether your hands are on the feet or holding the strap. Always lengthen the front torso into the pose, keeping your head raised. If you are holding the feet, bend the elbows out to the sides and lift them away from the floor; if holding the strap, lighten your grip and walk the hands forward, keeping the arms long. The lower belly should touch the thighs first, then the upper belly, then the ribs, and the head last.

  • Step 4

With each inhalation, lift and lengthen the front torso just slightly; with each exhalation release a little more fully into the forward bend. In this way the torso oscillates and lengthens almost imperceptibly with the breath. Eventually you may be able to stretch the arms out beyond the feet on the floor.

  • Step 5

Stay in the pose anywhere from 1 to 3 minutes. To come up, first lift the torso away from the thighs and straighten the elbows again if they are bent. Then inhale and lift the torso up by pulling the tailbone down and into the pelvis.