Surya Namaskar or Sun Salutation is a sequence of 12 powerful yoga poses. Besides being a great cardiovascular workout, Surya Namaskar is also known to have an immensely positive impact on the body and mind.

Surya Namaskar is best done early morning on an empty stomach. Each round of Sun Salutation consists of two sets, and each set is composed of 12 yoga poses. You might find several versions on how to practice Sun Salutation. However, it is advisable to stick to one particular version and practice it regularly for best results.

Besides good health, Surya Namaskar also provides an opportunity to express gratitude to the sun for sustaining life on this planet. So, for the next 10 days, start your day with a feeling of grace and gratitude towards the sun. Do 12 rounds of Sun Salutation, followed by other yoga poses, and then relax with a round of Yoga Nidra. You will be amazed to find that this simple mantra will help you stay fit, happy, and peaceful throughout the day.
STEP BY STEP PROCEDURE :
STEP 1: PRANAM-ASANA
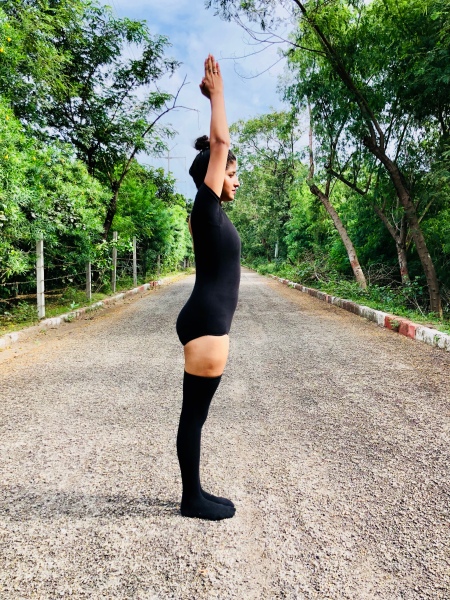
Stand at the edge of your mat, keep your feet together and balance your weight equally on both the feet.
Expand your chest and relax your shoulders.
As you breathe in, lift both arms up from the sides, and as you exhale, bring your palms together in front of the chest in prayer position.
STEP 2 : Hastauttan-asana
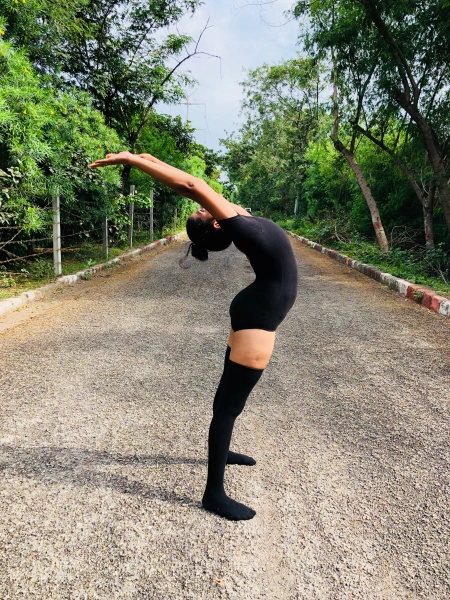
Breathing in, lift the arms up and back, keeping the biceps close to the ears. In this pose, the effort is to stretch the whole body up from the heels to the tips of the fingers.
And to deepen this yoga stretch
You may push the pelvis forward a little bit. Ensure you’re reaching up with the fingers rather than trying to bend backward.
STEP 3: PADHASTA-ASANA
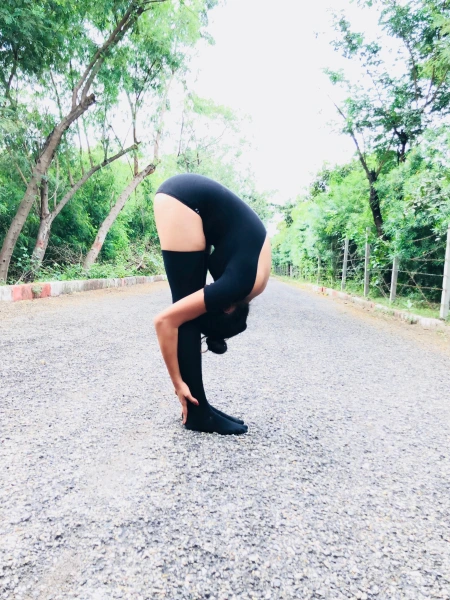
Breathing out, bend forward from the waist, keeping the spine erect. As you exhale completely, bring the hands down to the floor beside the feet.
to deepen this yoga stretch;
You may bend the knees, if necessary, to bring the palms down to the floor. Now make a gentle effort to straighten the knees. It’s a good idea to keep the hands fixed in this position and not move them henceforth until we finish the sequence.
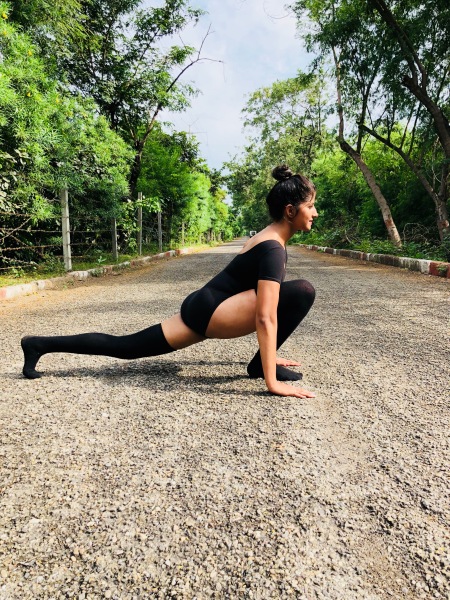
STEP 4: Ashwa Sanchalanasana
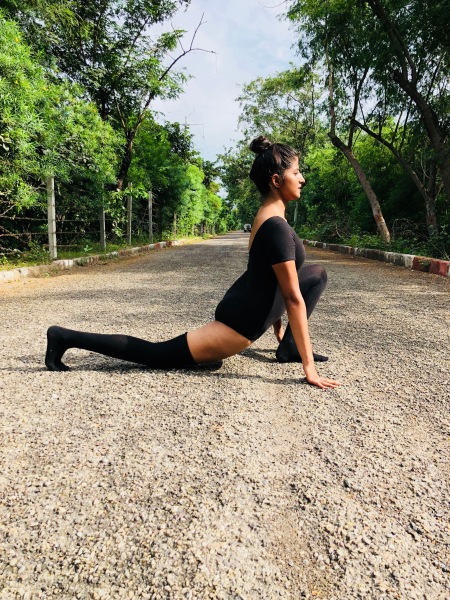
Breathing in, push your right leg back, as far back as possible. Bring the right knee to the floor and look up.
to deepen this yoga stretch;
Ensure that the left foot is exactly in between the palms.
STEP 5: Adho Mukha Svanasana
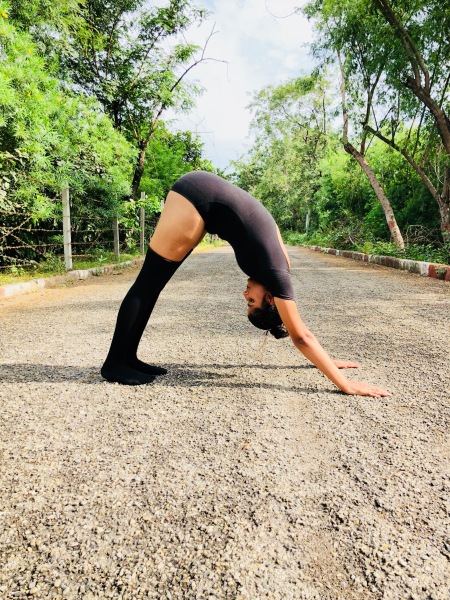
Breathing out, lift the hips and the tailbone up to bring the body into an inverted ‘V’ pose.
to deepen this yoga stretch;
If possible, try and keep the heels on the ground and make a gentle effort to lift the tailbone up, going deeper into the stretch.
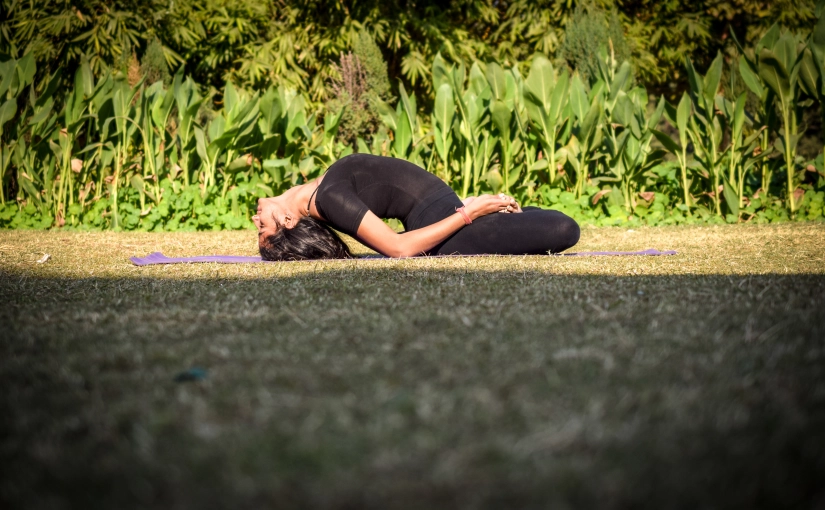
STEP 6: Ashtanga Namaskara
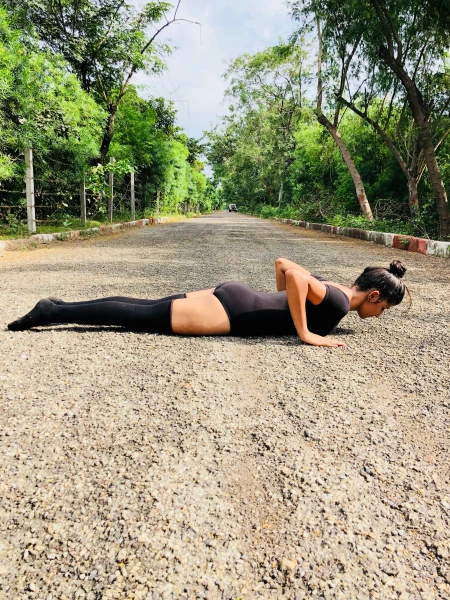
Gently bring your knees down to the floor and exhale. Take the hips back slightly, slide forward, rest your chest and chin on the floor. Raise your posterior a little bit.
The two hands, two feet, two knees, chest and chin (eight parts of the body) should touch the floor.
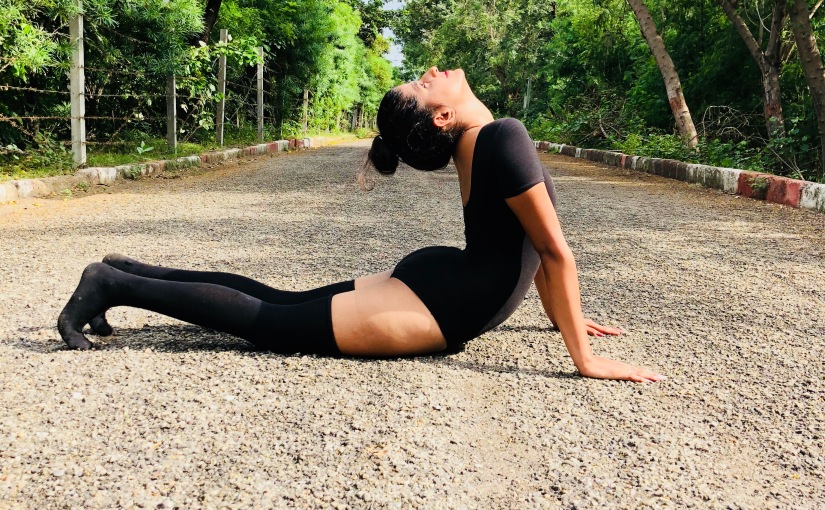
STEP 7: Bhujangasana
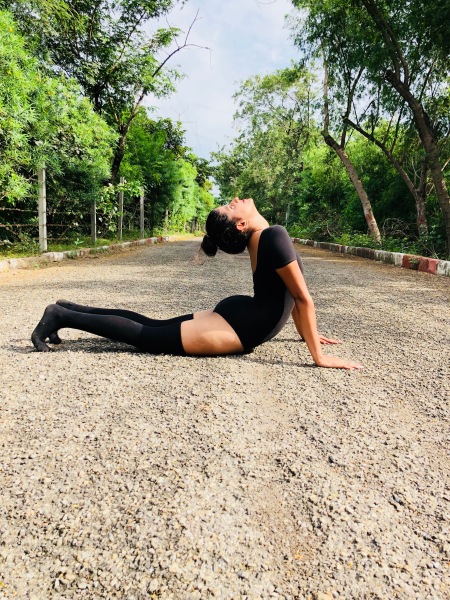
Slide forward and raise the chest up into the Cobra pose. You may keep your elbows bent in this pose with the shoulders away from the ears. Look up at the ceiling.
to deepen this yoga stretch;
As you inhale, make a gentle effort to push the chest forward; as you exhale, make a gentle effort to push the navel down. Tuck the toes under. Ensure you’re stretching just as much as you can and not forcing your body.
STEP 7: Adho Mukha Svanasana
REPEATING
Breathing out, lift the hips and the tailbone up to bring the body into an inverted ‘V’ pose.
to deepen this yoga stretch;
If possible, try and keep the heels on the ground and make a gentle effort to lift the tailbone up, going deeper into the stretch.
STEP 8: Ashwa Sanchalanasana
Breathing in, push your LEFT leg back, as far back as possible. Bring the LEFt knee to the floor and look up.
to deepen this yoga stretch;
Ensure that the RIGHT foot is exactly in between the palms.
STEP 9: PADHASTA-ASANA
Breathing out, bend forward from the waist, keeping the spine erect. As you exhale completely, bring the hands down to the floor beside the feet.
to deepen this yoga stretch;
You may bend the knees, if necessary, to bring the palms down to the floor. Now make a gentle effort to straighten the knees. It’s a good idea to keep the hands fixed in this position and not move them henceforth until we finish the sequence.
STEP 10 : Hastauttan-asana
Breathing in, lift the arms up and back, keeping the biceps close to the ears. In this pose, the effort is to stretch the whole body up from the heels to the tips of the fingers.
And to deepen this yoga stretch
You may push the pelvis forward a little bit. Ensure you’re reaching up with the fingers rather than trying to bend backward.
STEP 11: PRANAM-ASANA
Stand at the edge of your mat, keep your feet together and balance your weight equally on both the feet.
Expand your chest and relax your shoulders.
As you breathe in, lift both arms up from the sides, and as you exhale, bring your palms together in front of the chest in prayer position.
STEP 12: RELAX AND REPEAT !!
Incredible Benefits of Sun Salutation :
-
helps maintain cardiovascular health
-
stimulates the nervous system
-
helps in stretching, flexing and toning the muscles
-
excellent exercise for weight loss management
-
helps in relaxation of the mind
-
strengthens the immune system
THANK YOU FOR READING ! FEEL FREE TO CONTACT FOR ANY QUERIES AND ADVICES !
DO NOT FORGET TO LIKE, COMMENT AND SHARE !
FOLLOW TO REMAIN INFORMED ABOUT NEW UPDATES 🙂
STAY FIT , STAY HEALTHY ❤